Thursday, January 23, 2014

My "first" REAL quilt ... part 3

When I last left you, I had just finished making the quilt top of my first "real" quilt.  You can read all about that adventure HERE
It's a football playoff weekend, and I need something to keep my hands busy while watching all the games.  So, this morning I headed out to Michael's craft store and picked up some things that I have been told will help me when quilting.

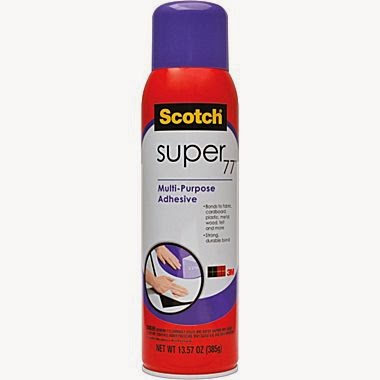
First, I picked up a bottle of Scotch Spray Adhesive. 
I'll admit, I was nervous to spray this on the fabirc... what if the colors bled? What if it stained my creation... what if? what if? what if? UGH... suck it up, Jamie - just spray it!

And so I did....

First I cut the batting I used to be a bit bigger than my quilt topper.  I sprayed the adhesive on the batting and then quickly laid the topper on the "aggressively tacky" (LOL that instructions on the can ACTUALLY say that!!!) surface and smoothed everything out.
Then I ironed the backing, sprayed the adhesive, and laid the now two-piece topper on top of the backing, smoothed, etc...  
And now to the hard part!
 So I started doing what I consider 'quilting"
 
If you look (not so closely) you can see that this is NOT real quilting.... and I'm not exactly sure what this whole "rock the needle" thing means.... but I'm going to find out on Saturday when I see Charlene, THE QUEEN of QUILTING! 
Anyhoo.... for now, I have this hoop on my quilt with 'non-quilted", yet "quilted" parts..... <sigh>

Tuesday, January 14, 2014

My "first" REAL quilt ... part 2

I ended my last post with 16 quilt squares that I had been prepped and were ready for the next phase of my project.  It was also 2 am and I felt as if I was at a natural stopping point.  
The next morning I woke up, enjoyed the snow for about 5 minutes, then went straight to my office!  I was so excited to get back to work. 

The first thing I decided to do was iron each piece and to go back and trim them to size.  I knew some of the cuts weren't the best since it was my first time using a rotary cutter.  So I took some time to really make everything line up nicely and be ready to move on to the next step.
Once I had them all trimmed, I decided to lay out the design and get an idea of what the quilt would look like.  
I really like how colorful it is.  Once it was laid out, I was able to match up the smaller rectangles that were cut 2x7 to go along on side of each square.  

At this point, I went back and ironed each 2x7 rectangle and trimmed it as well.  I decided if I had spent so much time making everything else look nice, there was n reason to start slacking now!
Sewing this was SUPER fast...mainly because it was a straight edge, unlike the design from the previous day!

Once I had all 16 pieces created, I laid them out again. This helped to piece the sides together, but also really motivated me to keep going because of how awesome everything was turning out! Apparently Dozer didn't share the same enthusiam!
Next I trimmed up the sides a bit, and then added on the 2x8.25 rectangle along the long side of each piece.
I absolutely LOVE how the color combos kept coming out!  So bright... so FUN!
I laid out the pieces one more time and was ready to start making my strips to make the final quilt topper.
And once all four strips were together, my topper looked like this.... yeah, I know, no surprise, but still LOVE IT!
When I took it in to show hubs, Dozer decided to lay claim to it for himself!
Again, this seemed like a natural pausing point for the night. Well, that, and I'm super nervous to figure out the "quilting" portion of this project!

Catch you next time when I dive in head first!

Saturday, January 11, 2014

My "first" REAL quilt... part 1

We've been having a lot of snow days here recently... kind of strange for Virginia, but I've secretly been loving the chance for a "bonus" day where I can just enjoy my time.  The other day when I heard we had the possibility of getting enough snow that I might have two days off, I headed out to the store.  Not to be cliche... but we really did need bread! I had forgotten it when I went grocery shopping the day before.  I don't usually grocery shop at Wal-mart, but decided to stop in just to grab the loaf.  This of course meant that I had to walk around the entire store looking for any type of project that might catch my eye.  Surprisingly, they had a pack of fat quarters that I instantly fell in love with!.
I wasn't very familiar with batiks, but I LOVED the color and the cool patterns that had been created on the cloth.  As I looked more at hte fat pack, I noticed it came with a pattern for a quilt on it. Not only did it come with a pattern, but an entire website of free patterns AND the side of the pack told me all materials I needed for the project.  Hmmm....  this seemed like a great first project, a new, fun pattern with all the materials right in front of me.... okay.... SOLD.


I must confess, I've never made a quilt "the right way" before.  I made a quilt back in high school, but I hand cut each piece with a pair of scissors, didn't line things up correctly, didn't iron as much as I should have, and was rather sloppy with most of the seems.  BUT I taught myself how to do it and was pretty proud of what I accomplished.  I decided with this project that I wanted to do everything "by the book" - seams, ironing, trimming... everything.

As I left the store, the snow had already began.  I headed home, pulled out my cutting mat and tried to figure out how this whole concept was going to come together. Firsts, I laid out all the colors and just enjoyed the fun designs (see picture above).  Then, I decided to start cutting the squares.  I needed 4 sets of 7x7 squares in each of the 8 colors.  As some of the colors were very similiar in color, and because I had to remember which one was A, B, C....H, I made a little "cheat" strip to help me. I also had to use freezer paper (I only had wax paper, but it still worked) to make 16 design templates.
 Then I started layering the pieces together with the the wax paper and was ready to head up to the sewing room.
I was a bit leary of sewing through both layers of cloth and the wax paper, but decided the worst thing that could happen was having to cut out two more squares.... so I quickly got over my anxiety, and just tried it!
This was my first square. Before I attempted 15 more squares, I was curious to see what the design was going to look like, so I dug in... literally.  First, I carefully removed the wax paper.  I learned pretty quickly that I had to pull gently or I would rip of the threads.  I ended up going back over this square again in some areas with the machine to make it sturdy.  Then to get the "reverse appliqued" look, I carefully poked my scissors through the top layer of fabric and cut a tiny bit inside the seam, following the design.
As you can see, I also decided to use fun blue thread instead of white.  That may seem like a little thing, but it was a big step for me (I've never used a "fun" thread while sewing!).  I really liked how the colors contrasted and what this design had the potential to be, so I kept cutting and ended up with a square that looked like this:
It was at this point that I knew that I was going to love this design.  After making the square above, I decided to assembly line the process:  sew all 15 together, remove the wax paper on all 15, then cut out the pieces.
I ended up getting pretty engrossed in the project and before I knew it, it was 2 am.  Thankfully, school had already been called off for the next day!

I ended the project that night with all the pieces being cut and ready for the next step.  Check back soon to hear about part 2 and eventually part 3 and maybe 4 of this project!


Friday, January 3, 2014

Curtains for my office

A few months ago, my MIL and I were walking through Bed Bath and Beyond looking for shower curtain hooks for some project and we saw a TON of shower curtains on clearance...  Normally priced $20, on clearance for $5.  One of them caught my eye very quickly.  

The fabric was a fabulous orange color with a great raspberry print.... JUST LIKE MY OFFICE!  It was pretty easy to convince me to grab them and save the fabric to eventually make curtains for the office.
The fabric got set aside and I'll be honest, I kind of forgot about it.... until the other day when hubs walked into the office and said I needed curtains.  It was then that I remembered... HEY I was going to make some of those.... I HAVE THE PERFECT FABRIC!!!  And so project #2 began!

Because they were shower curtains, I decided to leave the top as is and just cut and hem the bottom.  Then I went to Big Lots and bought a dark shower curtain rod and some hooks.  SUPER SIMPLE and they turned out SUPER CUTE!  I decided to only make them 3/4 of the window to keep the room bright and let the natural light still shine in.

LOVE THEM!


Project #1 COMPLETE!  HOOZAH!

Tuesday, December 31, 2013

Merry Christmas to me! The beginning of a new adventure!

For Christmas, I received the best surprise.... my husband bought me a sewing machine!  Now I don't have to drag all my stuff over to my mother-in-law's house and feel like I am not only making a mess there, but being a burden.  AND.... now I can really teach myself how this whole sewing thing works.  WAAAAY back in the day my grandmother showed me the very basics of a sewing machine, but if you don't use it... you lose it!  SO, this blog will be a way for me to share my creations, my frustrations, and any information that I may learn along the way! 

Anyway, back to Christmas...  Here is my new sewing machine!  It's perfect.  It's a Singer Simple model which means it was ridiculously easy to set up BUT still has some pretty cool bells and whistles.  I'm super excited to learn all it can do.  So far, my favorite part is on the far left.... built in thread cutter!
Not only did hubs get me a cool machine, he talked to family members and had them accessorize me! Below you can see the sewing box, filled with thread, needles,pins, etc.... the rotary cutters and super sharp fine point scissors, the bobbin box and super fun pin cushions!
I quickly realized that I needed to pick up two things to help in my adventure.... first... an iron!  We have one *somewhere* in the house (you can tell how much it gets used by that statement!) but I couldn't find it AND I decided that I should have one dedicated to sewing... right? Okay, well that was my justification regardless!
AND.... I needed an awesome rotary cutting board.  Joann's had a 50% off all sewing items sale! SO not only did I get a HUGE cutting mat (3' x 5') BUT I got it at half off!  WOOOOOO!
When I got home from shopping, I had a bit of a dilemma.... I wanted to sew but my "office" was a disaster.  I don't use it often and it tends to collect various things that need to be filed, or really that I just don't want to deal with.  So, I took a few hours one day and I cleaned it out!  Below you can see the before and the after... DON'T JUDGE the before people... no really... stop it!

Before....
 Before.... lots of boxes on the floor.... pictures spilling out everywhere.... bags and random papers all askew.... UGH.... printer taking over desk.  Treadmill in the way.....
After...
 After.... moved the filing cabinet to the closer along with two hanging organizers.  Found homes for all the papers, moved the printer to the shelf.... shuffled the desk 2 feet to the left. Added all the sewing stuff!
SOOOOOO much better.... now, as you can see from the last pic...I just need to make some curtains!   That's some crazy mid afternoon sun!

Hmmm... I think I know what my first project will be!